Terrains
Source
- Procedural
Generate a terrain from math and magic (actually more math). The procedural terrain engine uses several algorithms depending on the terrain type.
- From Heightmap
Generate the terrain from a heightmap file. This can be any image Blender supports, as well as ASC (Gridded ASCII) and HGT files.
Destination
- Object
Create a mesh object
- Heightmap
Create a heightmap image
Detail Level
The detail level setting controls how many vertex the terrain mesh will have. Increasing the level of detail will increase calculation time and memory usage.
Mirage offers three basic levels: normal, medium and high. There’s also a custom option to fine tune the level of detail (see below)
Terrain meshes are created from a plane subdivided in segments. The vertex count results from how many segments are used. For instance, the Normal level of detail has 128 segments, resulting in 16,384 vertices (128x128 = 16,384).
Normal and Medium are usually good enough for everything (specially when used with subdivision and multires). High is great if you are creating a massive terrain and don’t plan on changing it much.
Mirage will always generate the same terrain for the same seed, so you can use the different detail levels to bake higher detail into meshes with less geometry. Check the Blender manual for more information on baking
Warning
Watch out for memory usage when generating many terrains with high detail levels. Blender will keep data around for undo, making RAM usage grow and grow. Save and restart Blender if you see memory usage in the info bar growing too big.
Custom detail level
It’s also possible to select a custom level of detail besides the basic three. Simply select Custom in the detail level menu.
You can pick different amount of rows/columns, which creates rectangular terrains.
Settings for Procedural terrains
- Size
Size of the terrain object in the scene
- Scale
Scale of the terrain. A smaller scale creates a terrain representing a smaller area (like a few square meters).
- Height
Maximum height of the terrain
- Offset
The noise that generates the terrain is infinite, the actual terrain is only a “window” into it. The offset setting lets you move that “window” in the X and Y axis.
- Rotation
Let’s you rotate the terrain without rotating the object
- Seed
This is a number used to initialize the terrain algorithm. Different values will produce different terrains, however a specific seed will always generate the same.
- Auto-seed (clock icon)
Use a different seed every time a terrain is generated. The seed value will be updated, so you can un-tick it if you find a seed value you would like to keep.
- Terrain Type
Changes the Terrain type
Diorama

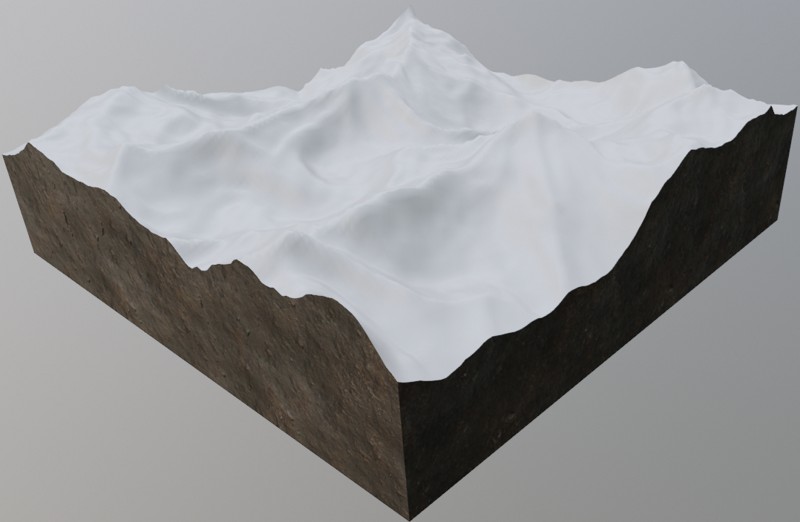
Generates a cube that can be used to represent a cross-section of the ground below the terrain. This modifier extends terrain generation underground, creating a Diorama-like effect.
The cube is an indepentent object parented to the terrain. It also has all its transformations locked for convenience.
Due to limitations in Blender API, the diorama cube can’t be auto updated when the terrain is modified (for instance sculpted). To make the diroama fit an updated terrain, look for the Update Diorama button in the tools panel.
This setting controls the height of the diorama cube. This will not change the position of the terrain, the cube grows “down” instead.
Types of procedural terrains
Mirage uses different algorithms to create different looking terrains. The terrains type setting lets you switch between them. Each terrain type has different options related to the algorithm, and the kind of terrain it generates.
Future versions of Mirage will progresively add more terrain types.
Basic
A classic terrain based on fractal noise. Similar to earlier versions of Mirage.
- Breakup
How many bumps and differences in height the terrain has
- Roughness
General roughness of the terrain
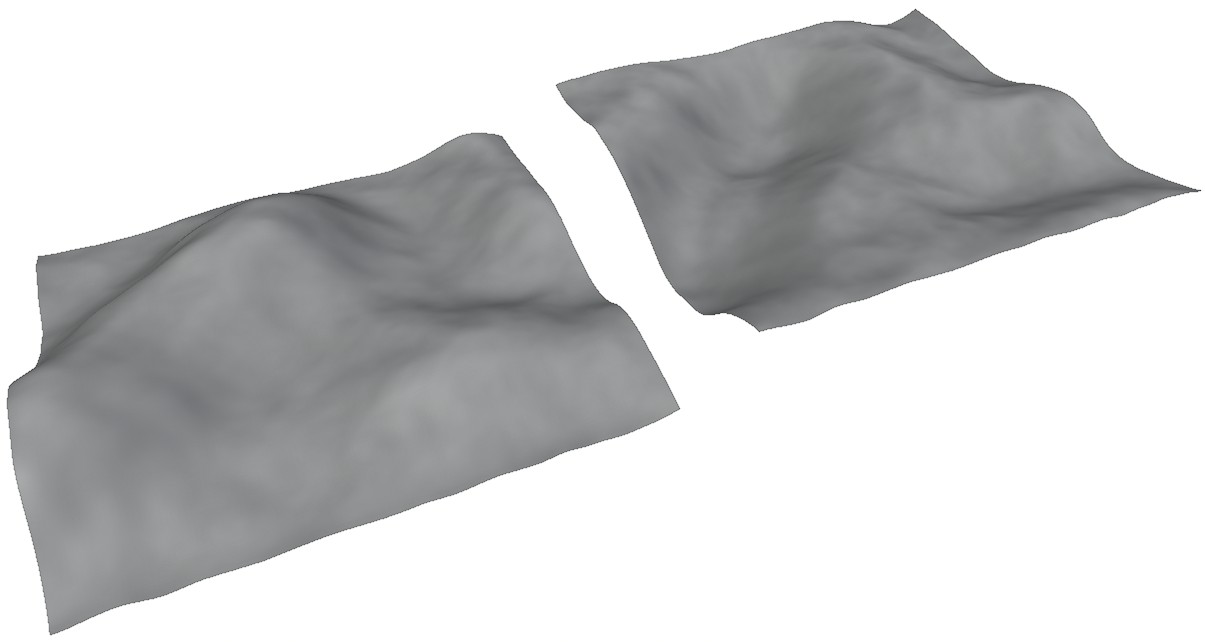
Smooth Hills
Creates smooth rolling hills and valleys.
- Difference
Height difference between flat areas and hills. This can be used to control how flat the terrain is.
- Flat Land
Increases the amount of flat areas between hills by increasing their slope.
- Detail
Adds some extra noise to generate smaller bumps and details. A detail of zero creates a silky smooth terrain.
- Twist
Controls how much the terrain twists on the X/Y axis. This can be used to create hills that “roll” into each other.
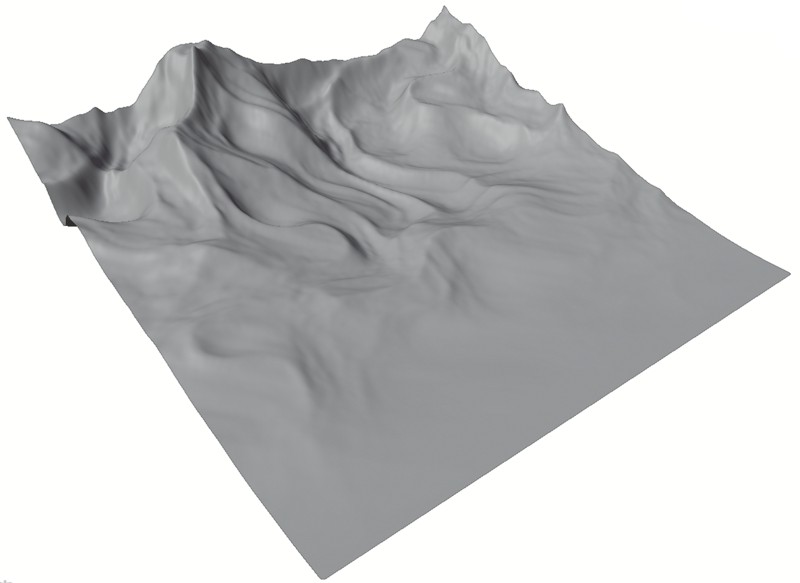
Mountains
Creates rocky, mountainous terrains.
- Ridgedness
Controls how “peaky” the terrain is. Ridgedness can be used to create mountain ranges.
- Sharpness
Controls how “sharp” the terrain looks. It makes the changes in the terrain more abrupt.
- Breakup
Controls the medium level of detail. A higher breakup generates more noise and variation.
- Roughness
Adds extra noise to add more detail to the terrain.
- Twist
Controls how much the terrain twists on the X/Y axis.
Settings for terrains from heightmaps
Heightmap File
This input sets the map to use. These can be either heightmaps, STRM, or Gridded ASCII files.
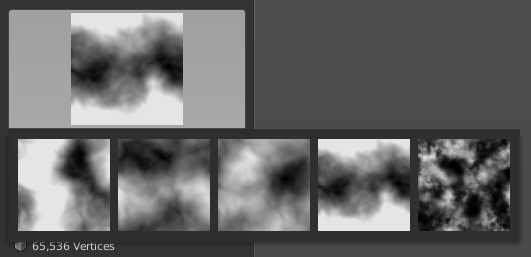
A heightmap (also know as heightfield) is a greyscale image representing elevation data. You can find them online by googling, or from websites like Natural Earth
Note
If you want to know more about heightmaps check this Wikipedia article.
STRM stands for Shuttle Radar Topography Mission. These files usually have a .HGT extension and contain elevation data obtained during the SRTM by NASA and the National Geospatial-Intelligence Agency (NGA).
Gridded ASCII files usually have an extension of .ASC and are plain-text based. That means you can open them in a text editor to inspect or edit. Gridded ASCII is a intermediate exchange format and not something intended for primary input/output. You might find them as an export option in GIS software.
Both STRM and Gridded ASCII files are converted to heightmaps internally. You can find the image files in the UV/Image editor and save them as separate files in case you want to have heightmaps of these files.
To select a file click the Select a Heightmap button and navigate to the file. Note that once you select a heightmap you will see a preview of it, and the button’s text will change to the name of the image file. You can click the preview to see a list of heightmaps you have previously loaded.
- Strength
How strong the displacement is (vertical scale of features)
- Size
Sets the size in real world units
- Diorama
Same as Dioramas for procedural terrains
Modifiers
These are optional effects that can be applied to the terrain.
Terraces
Terraces is a step-like landform. It consists of many flat or gently sloping surfaces. You can have as little as 2 terraces and as many as 12.
Each terrace happens at a specific percentage of the height of the terrain. A terrace set to 0% or 100% will not create a terrace per se, and will have little effect on the landscape. On the other hand, if there are no terraces at 100% height the terrain will have plateaus. If there are no terraces at 0% the terrain will have a plain at the bottom, at the height of the lowest terrace.
This modifier replaces the old strata modifier, plateau and sea floor settings.

- Terraces
Amount of terraces
- Invert Slope
Invert the direction of the slope between steps
Each terrace also has two settings:
- Terrace #
The slope at which the terrace appears
- Slope
The smoothness of the slope
Thermal Erosion
Simulates loosening and clumping of soil because of temperature changes.

- Repose Angle
Angle at which the terrain material piles without slumping. Decreasing the angle will flatten the terrain more. It’s also know as the Talus angle.
- Strength
Set how much this effect changes the terrain
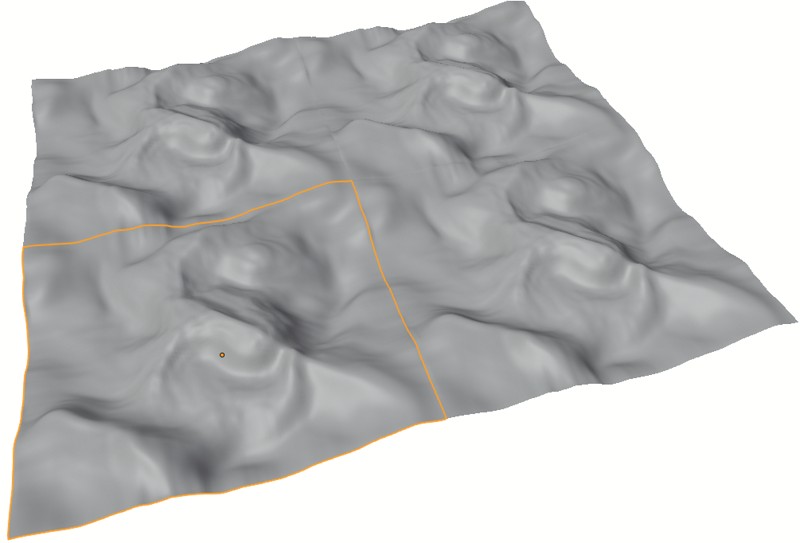
Water Erosion
Simulates erosion caused by rain and/or springs. Rain falls randomly over the entire terrain, while springs are located in a specific place and add a constant amount of water. Springs can be used to carve rivers, though they might require a high level of erosion or a lot of simulation time.

- Time
How many times to run the algorithm
- Rain
Amount of rain for each iteration
- Erosion
Amount of sediment moved each iteration
- Evaporation
How much water evaporates each iteration (percentage per grid square)
- Springs
How many springs to use. Each spring has a location, radius and an amount of water to add each time the algorithm runs.
Smooth
Gradually lower the height of the terrain to zero. This can be done along one or two axis independently (linear) or in a circular way (radial).
For the Linear factor these settings are repeated twice, for the X and Y axis.

- Type
The type of falloff: Linear or Radial
For radial smoothing:
- Factor
The smoothing factor
- Size
Radius of the smoothing effect
For linear smoothing:
- Factor
The smoothing factor
- Smooth Start
Set the position along the axis where the smoothing begins
- Invert
Invert the direction of the effect along it’s axis.
For Edges smoothing:
- Apply on X axis
Smooth edges on the X axis
- Apply on Y axis
Smooth edges on the Y axis
Pixelate
Creates a blocky terrain
- Block Size
Size of the blocks composing the terrain
Invert
Invert the terrain heights.
- Factor
The strength of the invert effect
Island

Simulates an island by applying a mask on top of the terrain, making parts of it flat.
- Seed
Seed for the noise mask for the island
- Slope
Inclination of the slope where the island meets the sea
- Elevation
General height of the island
- Breakup
Noise size. Make the island silhouette more detailed and creates more small islands
- Size
Size of the island itself
- Roughness
Roughness of the island noise. Generates a more subtly detailed island.
- Noise Intensity
Strength of the noise mask effect. Increasing this goes from a single large island to several smaller islands.
Seamless
Makes the terrain tileable by connecting the edges of the terrain. It works by taking opposing edges and interpolating between them, then setting the result of that interpolation as the new edges. Finally, the new edges are blended with the terrain over several columns or rows. This last step can be controlled with the transition setting.
- Transition
How much to blend the repeated borders towards the center of the terrain. I recommend keeping this high, so it looks more natural.
Curve
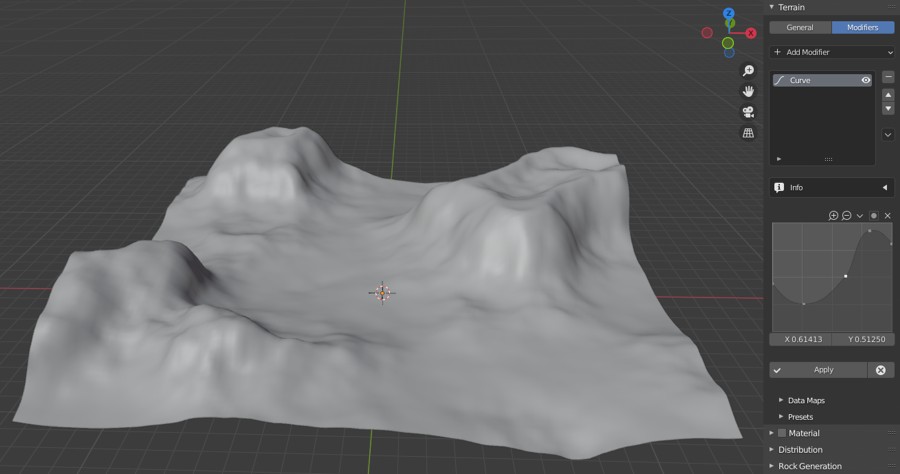
Remap the terrain heights to a curve. This creates plains, small terraces and many other effects.
Note that adding this modifier will also add a nodegroup to your blend file. The Python API doesn’t let us create curve mapping properties yet, so we have to use a workaround. Mirage will add an unused nodegroup with a lonely RGB Curve node, the alpha curve from that node is the curve that gets shown in Mirage’s panel.
- Curve
The actual curve to remap heights to
Data maps
Generate vertex groups or vertex paint layers based on the terrain’s slope and height